
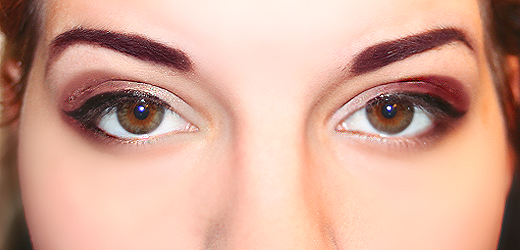
I started by applying the primer all over from the base of my eyelid to the crease. I'm not a fan of having eyeshadow all the way up to my brow, I just like to add a hint of shimmer and that's it. I use my ring finger, since it has the least amount of pressure, gently rubbing it onto my eye. I let it sit for about three seconds and then take a eyeshadow brush and take a little bit of Tako and put it on my the inner half of my eyes and lightly put it underneath my bottom lashes. I only take a lit of the eyeshadow, because the colour is so vivid and extreme that it only takes a tiny bit. When I put on the eyeshadow I like to gently pat it onto my eye with the brush, I feel like I get the full colour when doing so. I next take the lightest colour of the Shimmer Cube Palette and sparingly apply it right onto of Tako, except on the inner corners. The shimmer cube actually makes Tako get this really shimmery, light pink colour. Next, put some of the bright golden color and apply it on the center of my eyelid. I don't really blend until the end, it's a personal thing, but if you want you can already blend with a blending brush or even a a q-tip. The gold is a little bit dark, but it is very light as well. I take the darkest colour of the quad and put it on the outer corner bring it around underneath my eyelashes as well as along my crease. Lastly, I start to do all the blending. I can't really explain how I do my blending, I just like to make it so that one colour gently flows into the next and the darkest colour is blended along it's edges. I reapply colors where needed and then begin to do a winged liner.
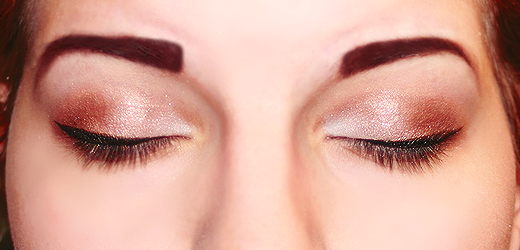
Now when I do winged liner I like to start from the beginning of my iris, slowly building up to the outer edge of my eye. I also like to put it right on my eyelash line, about a quarter of the way. You can do your eyeliner how ever you prefer or not where it at all! For my eyebrows, I really like them bold and dark. I take my eyebrow pencil and gently sketch out my eyebrows and fill in the bald spots of my eye. I only recently started doing my eyebrows, so I am probaby not the best person to give advice about eyebrows ha ha. What I do next is take any kind of brush and just brush through the eyebrows spreading the eyeliner lightly and making them more full. For this look I didn't do my lips, mainly because I thought it would look a lot better with plain lips. Well, that's it! This look is really great with glasses or even no glasses. I was hoping that it would turn out good and it definitely did! This the first tutorial I have ever done, I will do more in the future and hopefully they will be a lot easier to follow. Let me know what you think, enjoy!
No comments:
Post a Comment